The fashion industry & clothing guide

DIY Fashion · Upcycling & Customization

How to Distress Jeans

Factory distressing is just controlled damage done by someone else. Done at home — in the right places, with the threads left working — a ripped knee or a faded thigh looks identical and costs a pair of old jeans. This guide covers placement, the tweezer technique that makes rips look worn rather than cut, and how to keep distressed jeans from destroying themselves in the wash.

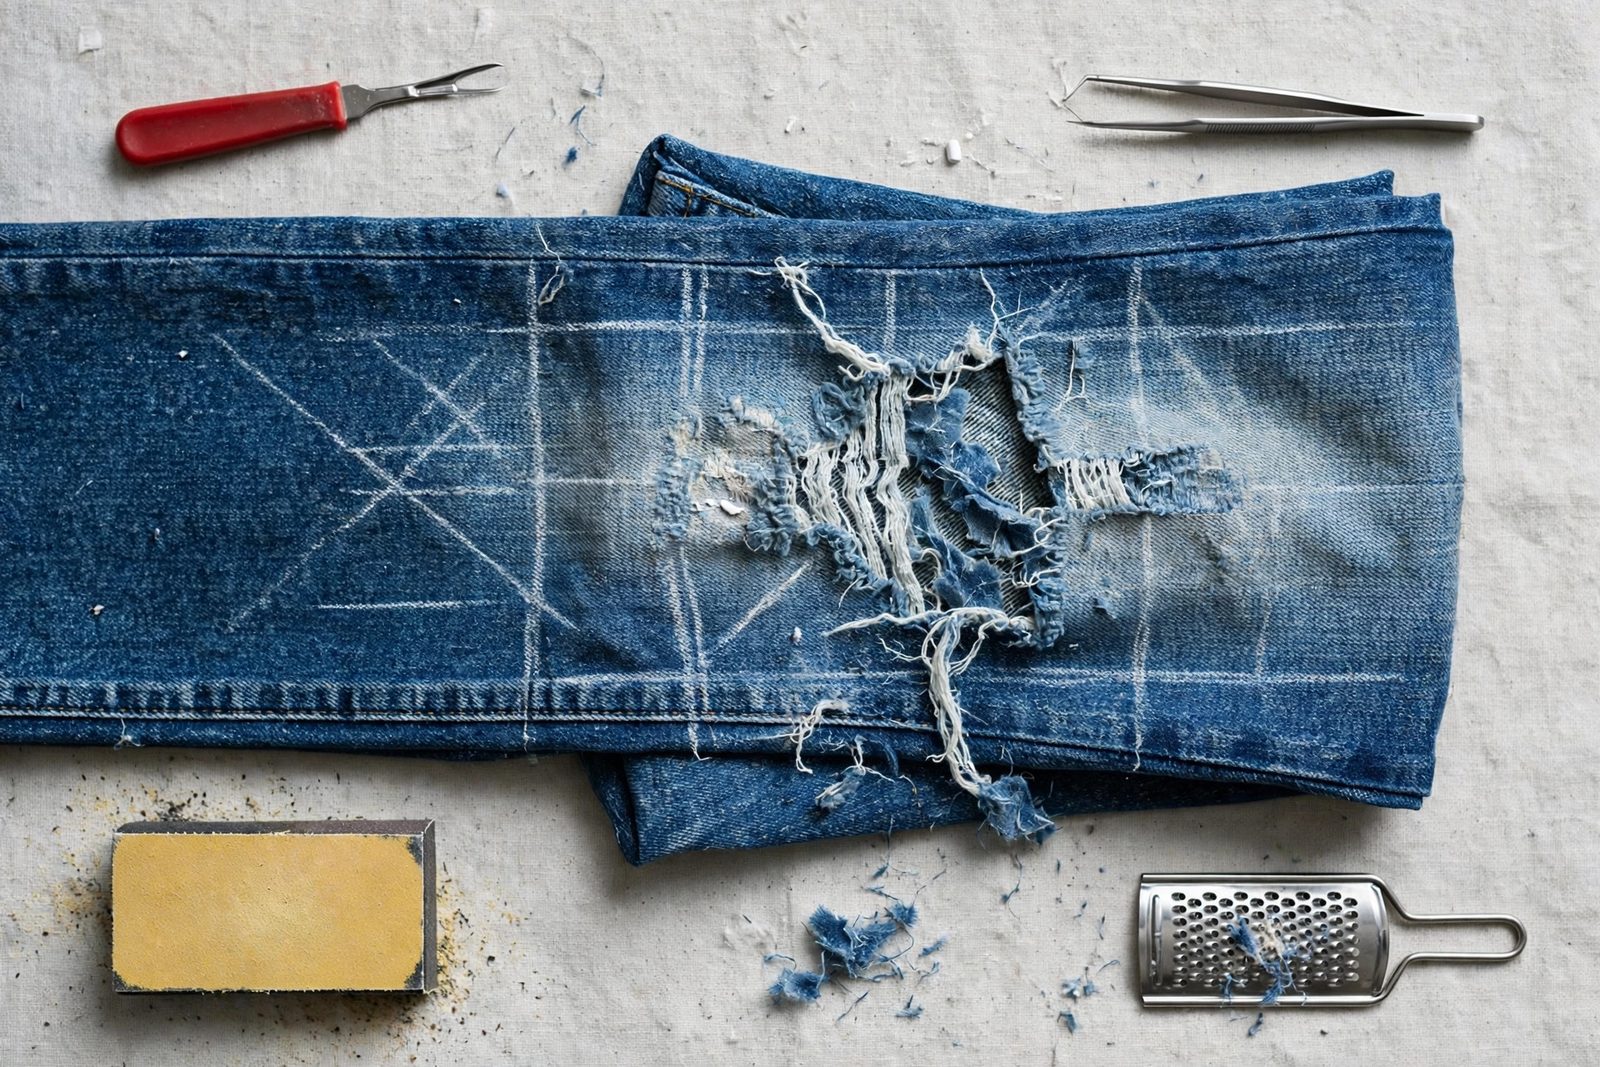
Jeans laid flat with a ripped, frayed knee and the tools for distressing: seam ripper, tweezers, sandpaper and chalk
Chalk lines first, tweezers second: good distressing is planned, not slashed.
On this pageWhere Damage BelongsRips, the Tweezer WayFading & WhiskersKeeping Them AliveCommon Questions

01 — Placement

Where Damage Belongs — and Where It Fails

Real wear is a map of movement, and your distressing should copy it. Jeans wear at the knees (flexing), the front thighs (friction and sun), the pocket corners and coin pocket (hands and keys), the seat (sitting), and the hems (dragging). Rips at the knee and thigh look honest; rips at the shin or mid-calf look costumey because jeans simply do not fail there. The failure zone to respect is structural: never cut across a seam, never take a rip within an inch of the inseam or outseam, and be careful just under the back pockets, where sitting stress concentrates. Put the jeans on, bend and sit, and mark with chalk where your own knees actually strike — that chalk line, slightly above the kneecap's center, is where your rip belongs. Our distressed denim style guide shows the placements the fashion versions use, which is the same map.
02 — The Technique

Rips, the Tweezer Way

  1. Chalk two horizontal lines

    Draw two parallel lines across the leg at the rip site, half an inch to an inch apart — this band is the rip. Everything happens between the lines.

  2. Cut along both lines

    Cut carefully through both chalk lines with sharp scissors or a craft knife over a cutting board inside the leg, so you never cut the back of the leg. Two clean cuts, nothing between them yet.

  3. Tweezer out the vertical threads

    Denim is woven from blue vertical (warp) threads and white horizontal (weft) threads. Between your cuts, pull the blue vertical threads out one by one with tweezers, leaving the white horizontals intact — that curtain of white thread is what makes a rip read as worn, not slashed.

  4. Rough the edges

    Rub the cut edges with sandpaper or a pumice stone to soften and fray them, and tease a few extra threads loose above and below the rip so it feathers into the fabric instead of ending in a hard line.

03 — Color Work

Fading, Whiskers and Scuffs

Rips are local; fading is global, and it sells the illusion. Sandpaper (fine grit, 220 or so) rubbed across the front thighs, the seat and around pocket edges removes indigo gradually and controllably — work in daylight and stop early, because you can always take more off tomorrow. Whiskers, the radiating crease lines at the front hips, are sanded in as short strokes following the natural crease directions you see when the jeans are worn. A cheese grater or microplane is the heavy tool for knees and hems where you want real fiber damage along with the fade; a pumice stone is the gentle one. For allover lightening, a short soak in diluted bleach works but is the least controllable method here — it lightens everything including the stitching thread, keeps working until neutralized, and can weaken fabric if left long. Spot methods first; soak only a practice pair. Frayed hems are the gentlest distressing of all: cut the hem off cleanly, then wash — the edge frays itself into a fringe that a single line of stitching a quarter inch above the cut will keep from climbing.

04 — Aftercare

Keeping Distressed Jeans Alive

A distressed jean is a structure with planned weak points, and care means not letting the plan spread. Stabilize any rip in a flex zone with fusible interfacing behind it. Wash inside out, in a mesh bag, gentle and cool; dry flat or on the line rather than tumbling, because dryer tumbling is exactly the repeated flexing that grows rips. When a rip does outgrow its welcome, it is not the end — it is the start of the next project: a patch behind it (the visible-mending move from our mending guide), an embroidered repair over it, or retirement into the denim projects pile, where a truly worn pair becomes a tote with a story.

Common Questions

Common Questions

Which jeans are best for distressing?

Mid-weight, mostly-cotton jeans in a classic fit — they fray into proper white threads and hold their structure around a rip. Very stretchy jeans distress badly: their elastic threads snap instead of fraying and holes gape. Dark, uniform washes show new fading best. And practice on a thrift pair first: every technique here is easier the second time, and the first pair is tuition.

How do you make rips look natural instead of cut?

Two rules. First, keep the horizontal threads: a natural rip is vertical threads worn away while the white horizontal weft survives — cut two horizontal lines and tweezer out the vertical threads between them rather than slashing a single slit, which just looks like a knife cut. Second, distress in the places jeans actually wear — knees, thighs, pocket corners, hems — with shapes that follow the body's movement, not neat geometric holes.

Will distressed jeans survive washing?

They will if you stabilize them. Wash inside out in a mesh laundry bag on a gentle cycle so rips cannot snag and tear further, and skip the dryer heat when you can. For rips in high-stress spots, iron a small patch of fusible interfacing behind the hole on the inside — invisible from the front, and it stops the rip from growing every time you bend your knee.

Keep Going

More to Explore

Distressing is denim customization — the style guide shows the finished looks, and the denim projects page uses the pairs too worn even for this.

Search Apparel Search